Wednesday 26 March 2014

Captain Hook: Progress on the Base Model

After half a week of tweaking, I feel that I am finally coming to a model that I am happy to progress with. Although additional adaptations could be made, due to time restraints of the project I really need to get on and begin modelling the clothing and accessories.


As you can see, the upper torso is more prominent and as well as adaptations to the facial features. I have kept the enlarged chin (although slightly minimised its prominence) in keeping with the initial designs. The arms have also been lengthened and the hands enlarged which makes the model feel more accurate in terms of anatomy. Onwards and upwards, and now to start the clothing!

Saturday 22 March 2014

Captain Hook: The Modelling Begins!

The past few days have been spent slaving away in an attempt to create a base mesh of Captain Hook which, as similar to that of an essay, will undergo several drafts before being transferred to ZBRUSH were the really magic happens!

Here are few quick renders of the model to give you an idea of progress so far, baring in mind this is the first draft and many improvements are still to be made!


(Click of image to view enlarged version).

As I'm sure you can see on even first glances, the proportions are wrong. They need work, and alot of it! However, as a first draft, the basics are now laid down and time is now needed to perfect loop flow and the characters anatomy and proportions. In particular (but in no ways limiting to), the arms seems too short, his hips are too high, the torso is not exaggerated nor wide enough at the top (near the arm pits). Also, more definition is needed in the muscle values of the arms and legs. And last but no least, the legs are too close together and too thin.

Although the majority of Captain Hook's body will be hidden under clothing, the more accurate I can get the body now, the easier adding clothes through extracting the faces of a body duplicate will be.

More pictures of progress to follow!

Thursday 20 March 2014

Inspiration: Anthony Vaccard

During some slight procrastination on my part, I came across some game environment work with perfect colour schemes for my redo of the Waiting Room which will have stronger sci-fi influences.


The dark greys with orange and blue make the scene immediately sci-fi to viewers. Also, the high level of detailing is achieved without displacement maps but rather leaving the normal map to do the work which brings down render time. Therefore, will work with normals for the re-do of my project. The modelled piping/wiring also adds a technological feel to the scene which, given the intended nature of "The Waiting Room" will be highly effective for my scene. Grand!

Wednesday 19 March 2014

Captain Hook: An Introduction

Because all my collaborative projects are hard-surface modelling, I wanted to ensure through the personal projects that I had chance to create a high poly character to have organic modelling on my showreel. Other than that though, I was stumped in terms of what to make. This quickly turned into google image searches looking for inspiration. This was when I came across existing characters whose designs had been changed and adapted to fit into a new scene or style. For example:
(Press on each image to enlargen it!)

Disney Hero's as fashion models

Disney turns hipster

Disney Villains as a fashion line?


I found this really interesting as not only through art am I giving life to a character, I'm giving it a different life and purpose. I really like the idea of building a pirate ship for my other personal project and wondered if there was a way to incorporate the two projects together as a final render. Boom! The idea of Captain Hook was formed.
Now, how could I adapt him? The options are endless, anything other than a pirate right? So through more google searching I came across a lyric from "New Math" by Ben Burnham:

"What's a Pirate minus the ship? Just a creative homeless guy". And this got me thinking. What if Captain Hook was homeless? What if, abandoned by his crew, he had lost his ship? Where is the line of him being a pirate captain or a homeless guy in fancy dress? This is the basis of the project.

Through pre-production development, I came to this design:


Heavy wear and tear in the textures of the clothing, dirty skin and shaggy, unkept hair was emphasized to show the loss of money and hierarchy. However, I tried to keep the main features from the Disney design to ensure as a character, he is still recognisable to the audience.

The modelling is to start as of tomorrow morning, and progress will be added as frequently as possible. Enjoy the updates- me hearties!

So there's a slight change of plan...

Here is the situation, as of next Monday, there are 9 weeks until the dreaded deadline. The trouble comes when the Pursuit environment is not to a standard I am anywhere near happy with and there is yet a high poly character to build and a whole Pirate Ship!
After talking to tutors they see the size of the environment the Pursuit requires and have agreed to let me minimise the pirate ship project to a small scene on which I can render my character and have the remaining time to perfect the alleyways. Sounds like a plan? Excellent, I thought so too!
Therefore, I need to have the Captain Hook modeled and ready to be placed into ZBRUSH by next Friday, this will leave me 2 weeks to make a small scene and an extra 2-3 weeks to get an environment together. Although this is a lot of work to get done, it is definitely a lot more manageable and, more importantly, possible to do to a high standard.

Onwards and upwards, onto the modelling of Captain Hook!!

Outmode: Lights

Forklife, check! Crates, check! Lights, Check!
Unlike the forklift, the purpose of the lights are to fill the scene, not to obstruct gamers and therefore need less detail polys and data to serve their purpose of decoration. I was asked by Will (director) to make a variety giving him the freedom to use where necessary to avoid repetition in the scene of the Warehouse. Challenge set!

Here is a give render of the models as well as the lights with diffuse, normal and specular maps added to them:


Saturday 15 March 2014

Outmode: We Have Crates!!

With the forklift all finished and ready for export the time came to make some crates. These were quick to produce which is another box ticked - something definitely to be relieved and grateful for!

Each diffuse was enhanced with AO maps and had a normal map added to, similar to the forklift, add some detail.


I feel they look sufficiently "knocked about" especially with the normal map added to give some definition and purpose to the grain of the wood.

Coming up next, light models and then finally sorting out the lighting for The Pursuit ready for the first submission in a couple of weeks time - Yikes!

Monday 10 March 2014

Outmode: Forklift is Textured!

The last 3 or 4 days have been spent staring at a forklift, and as perhaps boring or odd as this may sound, I've actually really enjoyed it! The challenge has been to cut down polys as explained in the last blog and to also texture the forklift in such a way that it can be believed to have been used. When showing the pre-production design to my director, (Will) he preferred the idea of a yellow forklift, similar to those of present day. Hence the slight design change! Also, I decided to get rid of the headlights as the forklift is not going to be working and there is no need for the added polys which can be placed elsewhere for the added detail.


Through the images above hopefully you can see the stages used to create the texture. It began just blocking out the colour to ensure it worked as a finished product. Following this, layers were added in PHOTOSHOP to add the needed wear and tear. The hardest of this was to texture inside to make sure the difference between cloth on the seat and the harsh metallic surface of the controls could be seen and recognised by the gamer. The scratches and splashes also added a particular challenge however, especially trying to get the UV shells to match up without seams showing. However, through trial and error switching between MAYA and PHOTOSHOP I believe this has been achieved successfully. Another challenge was making the glass look glass. A transparency map was added to achieve this.
I then added a normal map to help add subtle detail into the surface of the model:


After the diffuse got to a point I was happy with, I began adding a spec map to it which produced the following results:


With the Spec added, it adds a professional feel to it and will mean that in the game it will have a metallic gloss to help portray the texture of it.

Thursday 6 March 2014

Outmode: The Forklift

With The Waiting Room project completed, it was time to move onto the futuristic forklift. The purpose of this prop is to act as an obstacle to stop gamers venturing off where they shouldn't be on the map. This means high resolution textures as before finding the object can't be moved, the gamers are going to get extremely close to it!

Because the game is set in a futuristic land of robots, I didn't want to make a bog-standard, modern day forklift but one that would fit into a scene of duelling robots and technology. However, guessing what forklifts are likely to look like years from now, proved a bit of a challenge! Therefore, the design was based on the projection of car and vehicle designs instead.


And what became immediately obvious? Curves. And lots of them! Therefore, for my design I tried to bring this idea into the shape of a traditional forklift.


Obviously the actual forklift part had to stay right-angled to give the impression of strength and durability, but the main body of the design is all rounded like the car examples.

First began building the base mesh using as little polys whilst retaining as much detail as possible:


So far, although a good start, poly detail needs to be distributed slightly. For example, extra detail is added in the tires but on reflection, the eye level of the players will be the mid section of the exterior as well as the interior. Therefore, this detail can be left to normal maps to portray. Also, I'm not happy with the steering wheel, the shape feels off and needs figuring out. Update to follow in the next couple of days!

Wednesday 5 March 2014

Inspiration: Rockstar

I knew that research for studios to aspire to working for would need to begin pronto given that graduation is coming up and, well, I need a game-plan/next move. Although third year is daunting and, as a graduating student, we are expected to be "heads in books" or (more appropriately) eyes locked onto the computer screen with our life revolving around Maya. But, for a week, I allowed myself odd breaks to to play and watch Grand Theft Auto V. And just, WOW.

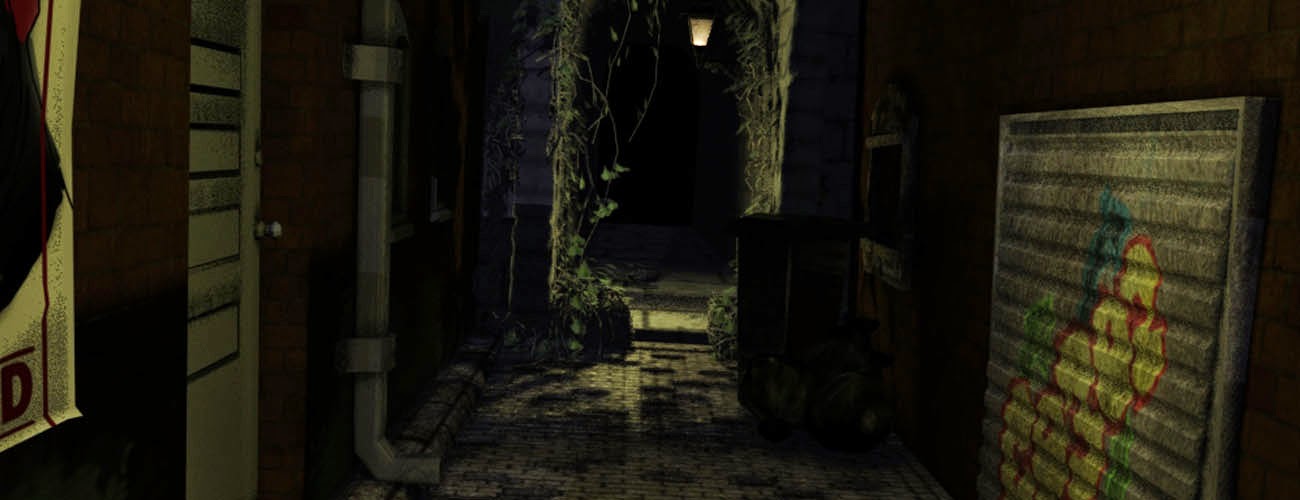
The detailing of the environment was absolutely insane! Not just the actual map size, but the quality of textures, the number of different models (for example, how many different types of vehicles). The extras and crowds. The characters. And the range of styles from environments in the outskirt/desert environment to one of a beverly hills. Jaw droppingly fantastic. So, here I am speeding down the pavements thinking, I need to work for these people. I need to be apart of something that through skill, passion and dedication (it took Rockstar 5 years to create with over 300 designers) they are able to create a game which, in my humble opinion, is flawless. Here's some examples from a quick google!

No copyright intended, I do not own any rights to these images!
This intrigued me to look into how Rockstar became the superpower of gaming that it is today...

It all began with two English brothers striving to work in music video production named Dan and Sam Houser and landing a job with the music label BMG in London. However, in 1933 BMG opened a new department named BMG Interactive with the aim of creating new video games. Realising that music videos were not their true calling, they began searching elsewhere for another outlet of their creativity. Enter the world of gaming!
During this time The Lemmings, Courier Crisis, Fire & Flawd and, most importantly, Grad Theft Auto were created. The Daily Mail took an instant dislike to Grand Theft Auto because of the high level of violence. However, despite the bad press, Take-Two saw its potential. And after buying BMG Interactive from BMG they shipped the studio over to New York and Rockstar was born!

The games released after can be found following this link (http://gta.wikia.com/Rockstar_Games) but the most famous and note worthy are as follows:

Grand Theft Auto (1997-present)
Red Dead (2004-present)
Manhunt (2003-2007)
The Warriors (2005)
Max Payne (2001-present)
L.A. Noire (2011)
Bully (including 'Scholarship Edition') (2006; 2008)
Table Tennis (2006)
Midnight Club series (2000-present)
Oni (2001)
Wild Metal (2004)
Smuggler's Run (2000-2002)
The games themselves are produced using the Rage engine (Rockstar Advanced Game Engine) developed by the RAGE Technology Group at Rockstar San Diego, with contributions from Rockstar North.

Now, Rockstar North. They are a studio to be reckoned with!
http://www.rockstarnorth.com/
Founded in 2002 and now the main studio behind the Grand Theft Auto series, these are responsible for the modelling and texturing of the characters and the environments and my gosh, do I want to be part of it!

Tuesday 4 March 2014

The Waiting Room: Finished!

With the "skirting boards" in, a diffuse added to the walls and the lighting fixed (the models of the light fixtures were being totally washed out with the glow effect) I believe I have reached a finished first project ready for rendering!
Here is the finished render with base models for the Outmode game to follow shortly :)

(Please press on image to view an enlarged version).


Monday 3 March 2014

The Waiting Room: Skirting Boards

Here are quick renders of the wires and skirting boards being crudely placed into the scene to get an idea of what they could potential add to the scene.

Wires:


Skirting Board:


Personally, I think the skirting is much more effective, subtly breaking up the walls without taking away attention from the displacement map, but more importantly, characters once added. 

Sunday 2 March 2014

The Waiting Room: Almost There!

Looking back quickly, a lot has developed since my last post, [insert small promise to update more often here]  displacement maps have been added to the walls and colour management settings have been put into place so the end of this project is in site and rendering is soon to begin!
Looks wise, the displacement map is more prominent and withstanding to the lights in the scene compared to the normal maps. However, averaging around 13 minutes per frame, the render times are being sacrificed for this, especially the long shot (included in this blog), the close up shots take around 2-3 minutes which is more acceptable.


In terms of finishing this project and making it the best it can be, it has been suggested to add "something" to the corners of the scene where the walls meet the floor or ceiling. So brainstorming this, I came up with either a simplistic skirting board design or better yet, wires to drive home the technological sense of the scene. Also, Chaitan has requested adding "Art of" books into the scene next to the wooden mannequin of the right hand shelf which shouldn't take to long. And then onto Will's project - Outmode.